Automated Digital Signage System
At EWall we developed application for an client who has enterprise company located in Europe which operates in 100+ locations. To facilitate the creation, editing, and management of menu information for restaurants or hotels situated at a specific station. Basically, site users are able to create and edit menus for any day, whether it is for the current day or for days in the future. Let's have a lookup at how the backend process of this web application happens in this article.
Overview
The system will dynamically render and display up-to-date menu information on the in-store screen by fetching data from the configured banner URL via ScreenCloud integration this process is aka Digital Display Advertising.
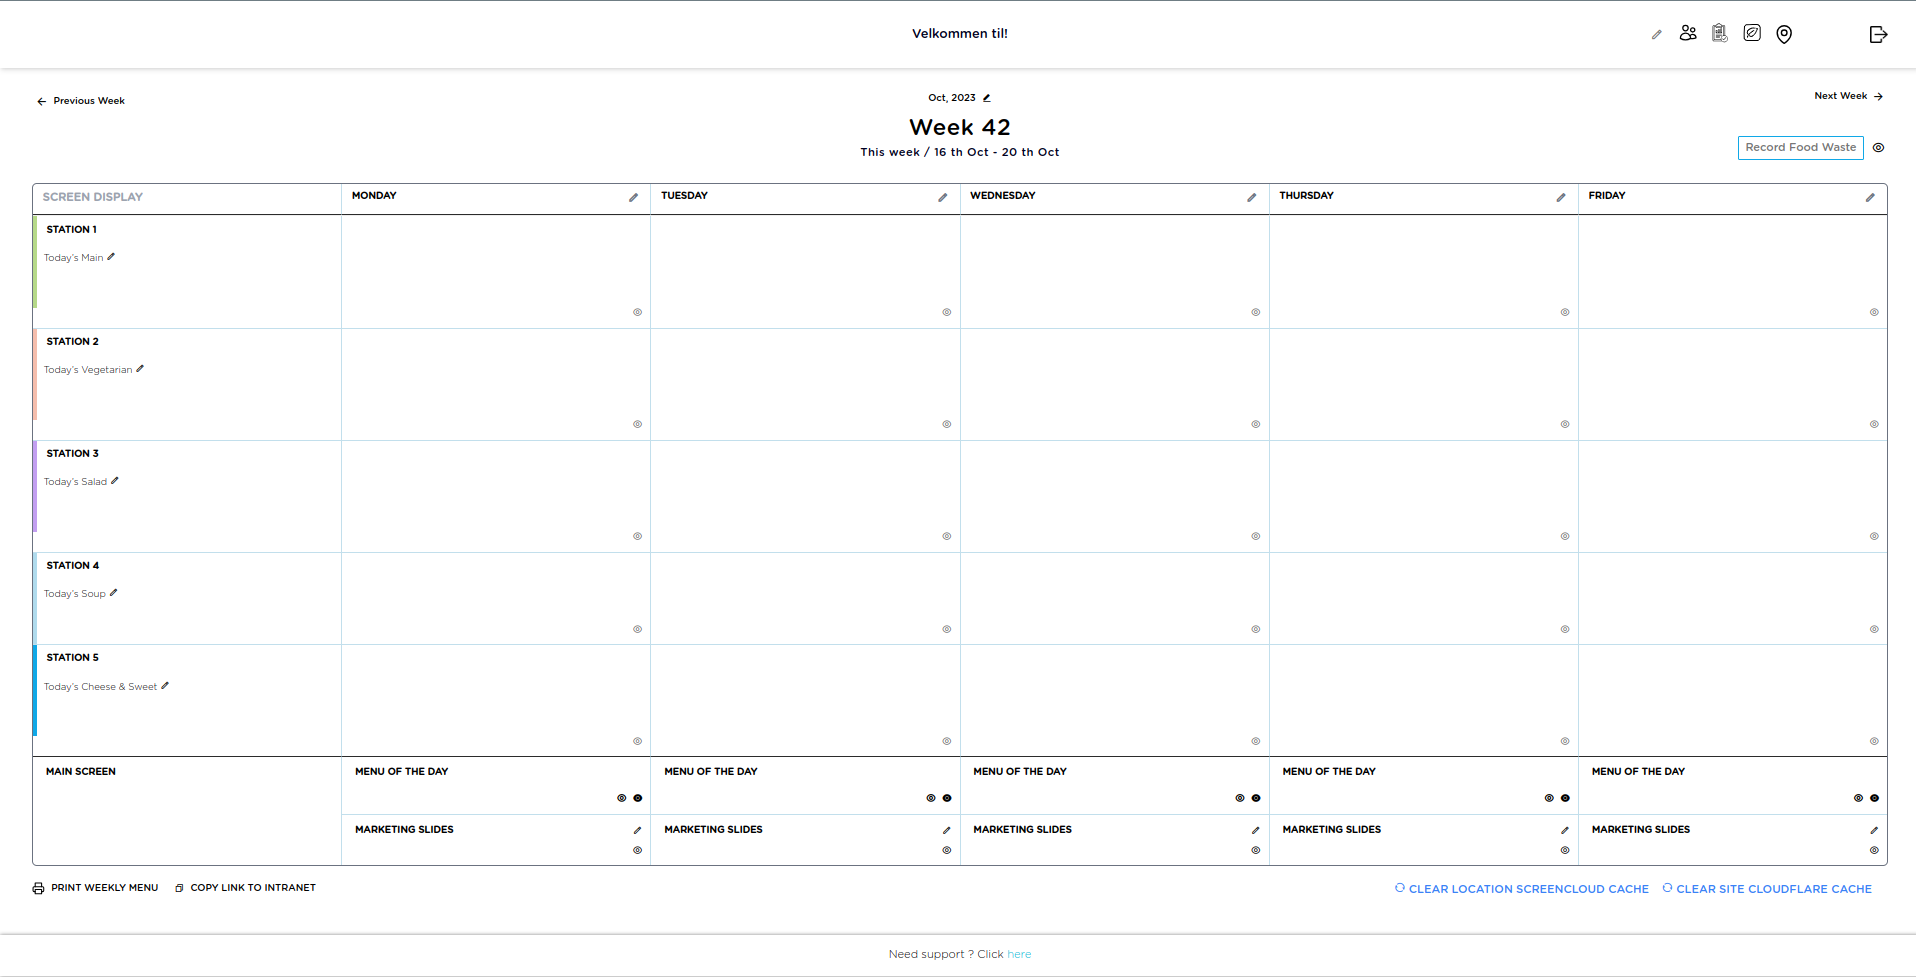
Additionally, users will have the capability to preview the station banner and its associated menu details, including allergen content, directly from the dashboard overview page.
In addition to menu information, site users can also add suitable allergens information to each menu on the edit menu of the day page. The menu information is translated into English content from Danish at the time the respective record is saved via Google Cloud Translation. The related allergens are also translated from Danish into English content when they are created or edited on the respective allergens page. Checkout the Technical stacks and work involved on this project.
Website
Manage Users

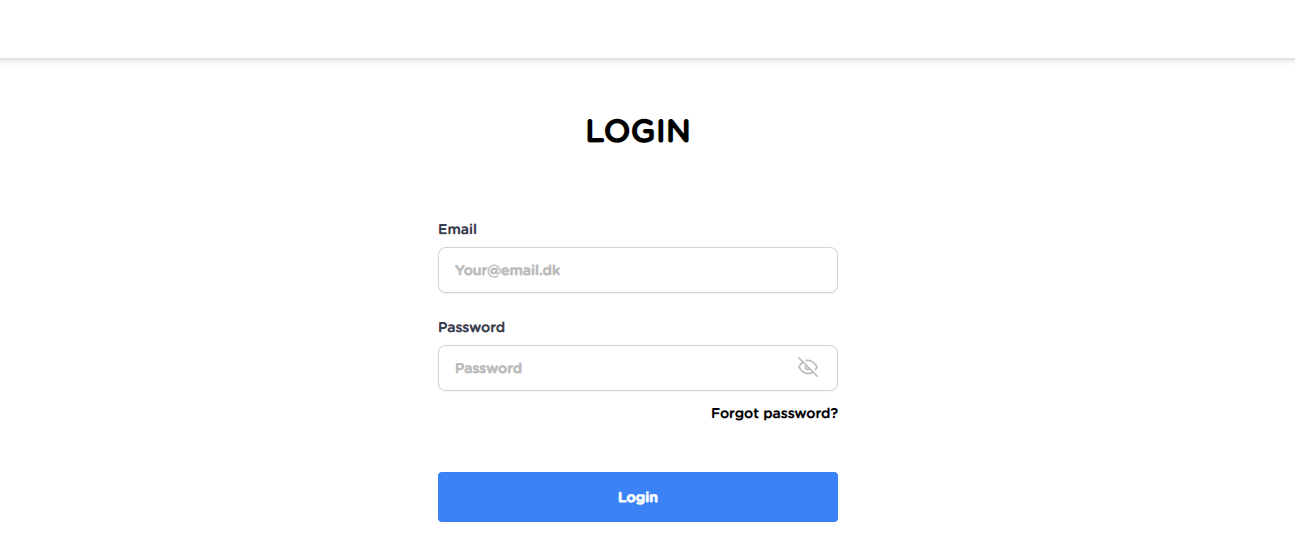
In the realm of user management, access to the 'Manage Users' link is an exclusive privilege reserved for admin users. A effortless journey begins with a click on the user icon in the header, ushering administrators into the 'Manage User' page—a meticulously organized repository of website users across 100+ locations in Europe. Pagination unfolds at 10 users per page, revealing essential details like Name, Email Address, and Location.

The plus icon acts as a portal to the user creation form, empowering admins to effortlessly expand their user base. Deleting a user is a breeze—simply select the user and click the delete icon. Navigating to the edit page of an existing user is a click away, except for the elusive main admin, strategically concealed from this user roster for enhanced security and administrative discretion.
Create/Edit User Page
In the user onboarding process, inputting the user's name, a valid email address, a password (with an optional show/hide feature), and selecting a location from a dropdown menu initiates a dynamic display of menu and station information upon login. The successful completion triggers the confirmation through a tick mark button in the form's top left corner. Any encountered issues prompt instant notification via a toast message, ensuring a smooth and error-aware user experience.
To edit an existing user's information, once any data is updated, the respective user needs to reload their active browser session for the changes to take effect.
Get Nutritional Results

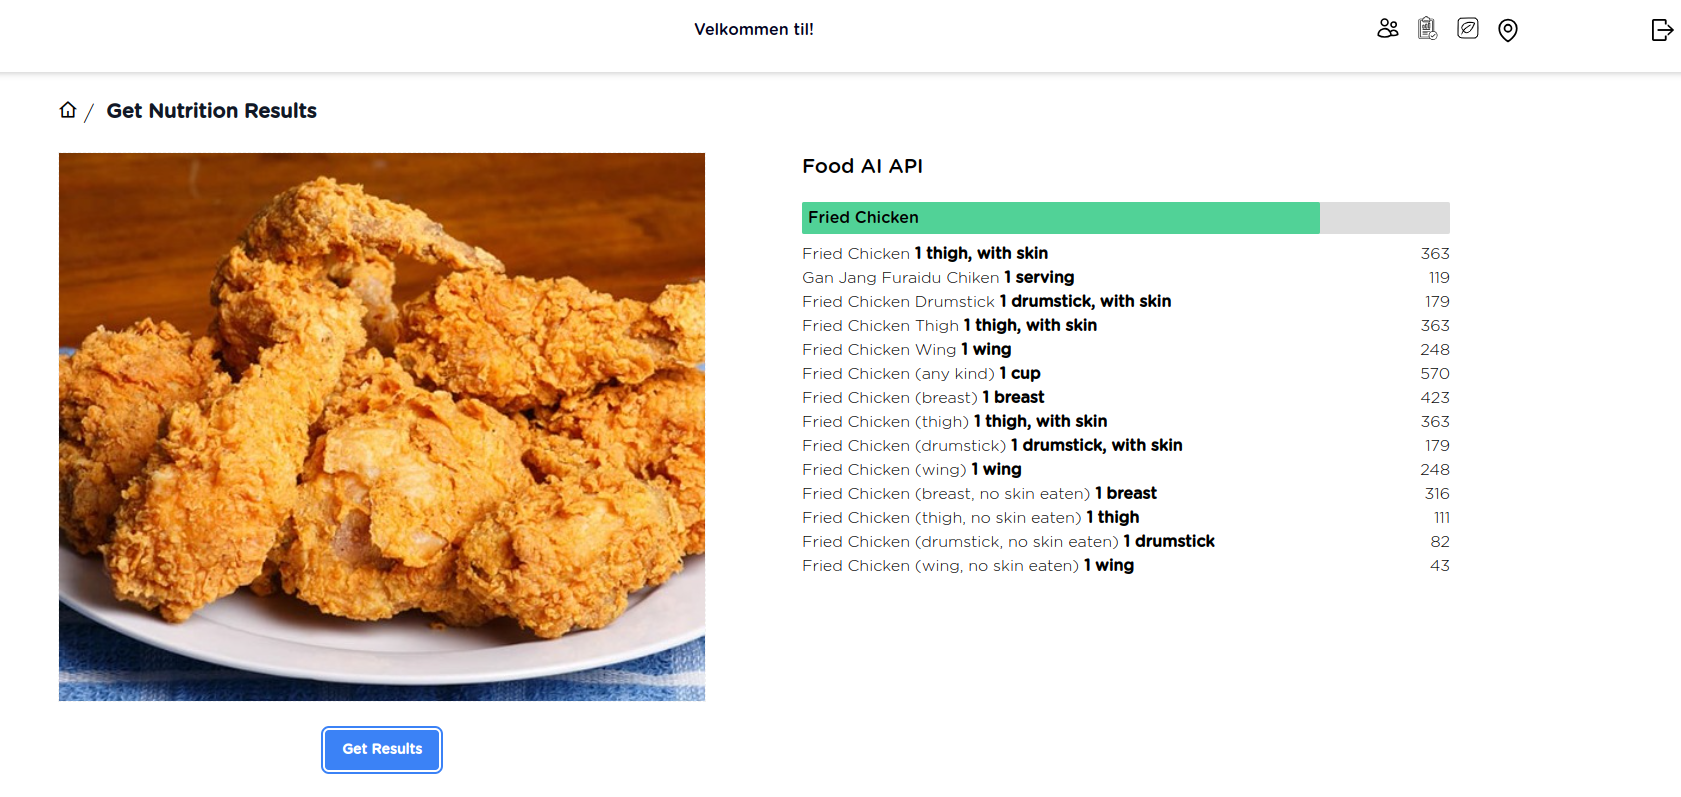
Exclusive access to the 'Get Nutrition Results' link is reserved for admin users within the current staging site. By selecting the designated icon in the top-right corner of the header, users are flawlessly redirected to the 'Get Nutrition Results' page. Here, the integration with the Caloriemama API empowers users to effortlessly upload images and retrieve comprehensive nutrition information.
Manage Dietary Preferences Page

The personalized dietary preferences icon link is selectively displayed based on user settings, ensuring a tailored experience. Upon clicking the icon, users are seamlessly redirected to the 'Manage Dietary Preferences' page, revealing an organized two-column view with 20 entries per page and 10 per column. The table showcases essential fields, including the Danish content dietary preferences name, crucial for mapping and integrating menu information on the Edit Menu of the Day page.
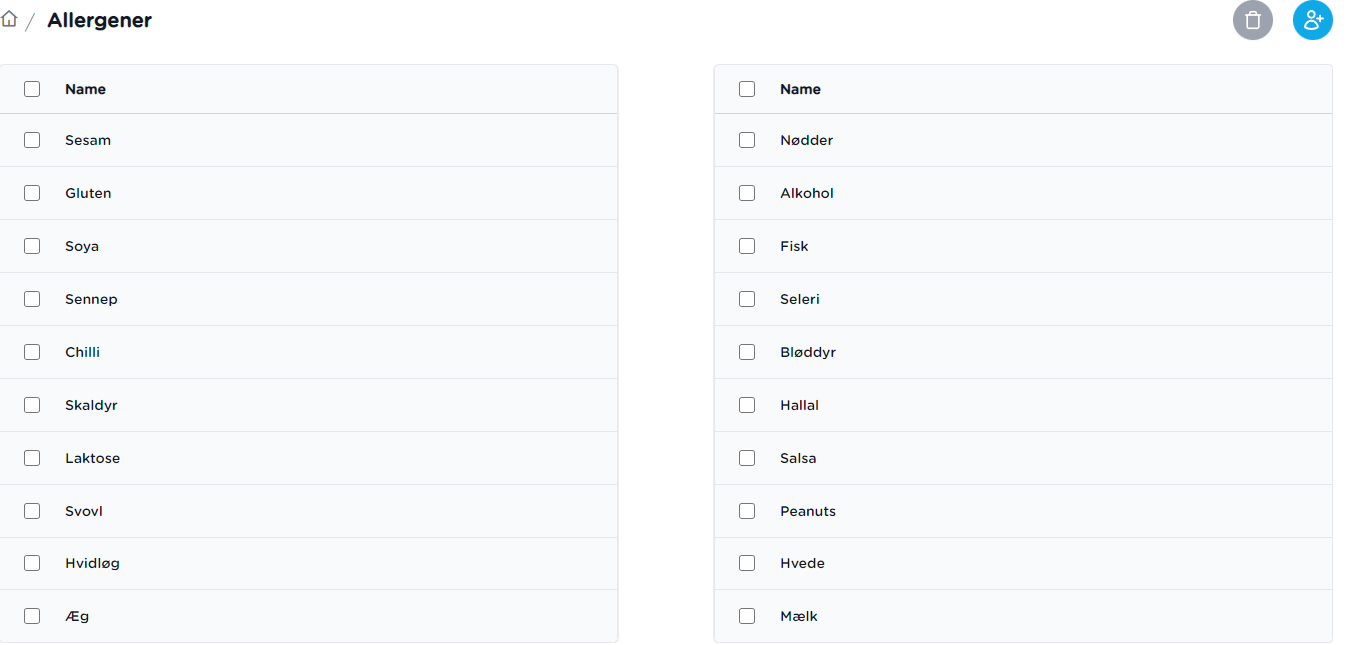
Create/Edit Dietary Preference Page
In the realm of dietary preferences management, initiating a new entry involves clicking the plus icon on the Manage Dietary Preferences page, effortlessly redirecting users to the Create Dietary Preferences form. Here, Danish content is entered into the textbox, and upon clicking the tick mark, the preferences are saved. Notably, our system employs Google Cloud Translation to dynamically translate and store this data in English, ready for deployment on preview or single station banners.
For deletion, a user simply selects the targeted dietary preference and clicks the delete icon atop the table within the Manage Dietary Preferences page.
Editing existing preferences is a breeze – by clicking on the desired dietary preference, users are efficiently redirected to the Edit Dietary Preferences page, facilitating updates to the Danish content.
Manage Locations Page
![]()
Exclusive access to the 'Manage Locations' link is reserved for admin users. By selecting the location marker icon in the top-right corner of the header, users are flawlessly redirected to the dedicated 'Manage Locations' page. This page serves as a comprehensive repository, presenting a detailed list of all available locations across the website.
Create/Edit Location Page
To initiate the addition of a new location, navigate to the 'Manage Locations' page and select the plus icon located at the table's top. This action seamlessly redirects you to the 'Create Locations' form, where you can input essential details such as the location's name, logo (uploading a file), allowed stations, and screenCloud screen IDS (provided as a comma-separated string). Upon completion, simply click the tick mark to effortlessly save the location content.
Footer Section
Support Form
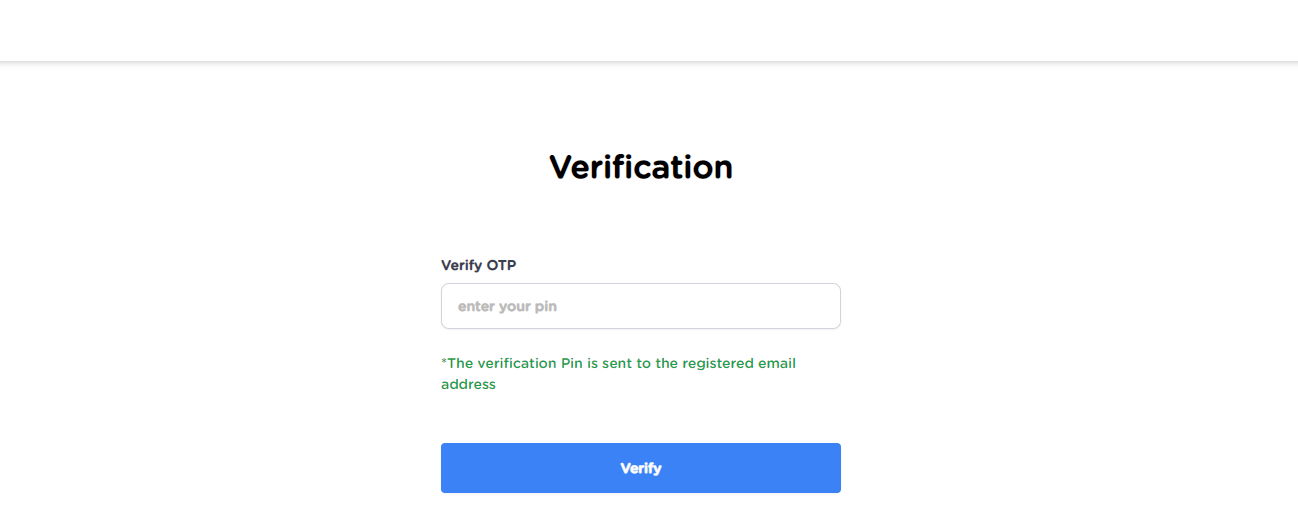
In the user interface's footer section, an accessible Support Form link caters to authenticated users. Upon activation, a popup interface emerges, facilitating user inquiries directed to website administrators configured in the environment files. Triggering the API endpoint, /send-support-mail initiates the dispatch of support emails to designated recipients.
The form mandates essential fields—name, email, title, message, and attachments supporting .png, .jpg, .pdf, .docx, and .doc formats—ensuring a comprehensive submission process. All fields are obligatory for submission validity, maintaining a sleek and effective support communication channel.
Print Weekly Menu on Dashboard Overview Page
Access the weekly menu print feature effortlessly positioned at the bottom left corner of the dashboard overview page. Upon activation, the system impeccably triggers the default browser's print preview, presenting a dedicated printer-friendly display for optimal content output.
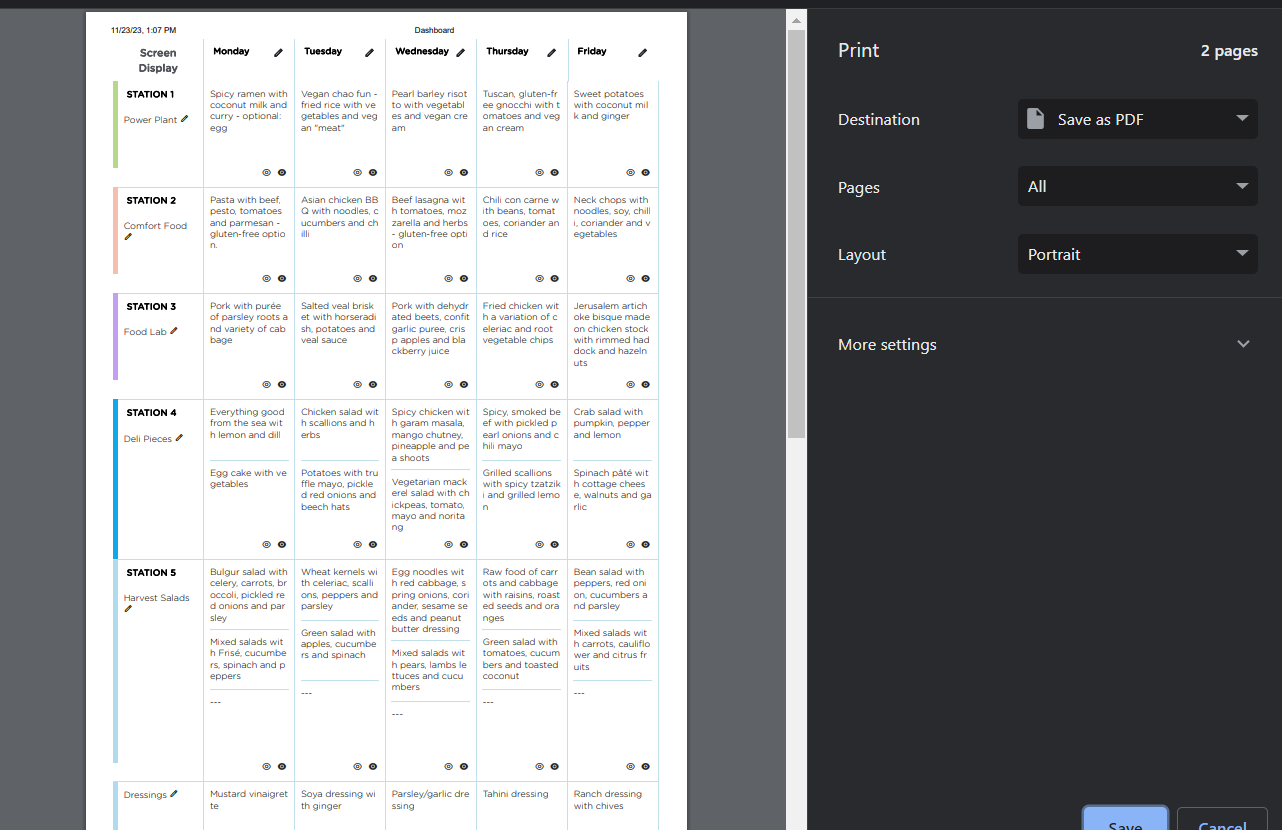
Copy Link to Intranet Page
The implementation of the 'Copy link to intranet' feature on the dashboard overview page facilitates the effortless sharing of the weekly menu page link. Positioned at the page's bottom, this functionality enhances user accessibility. Navigating to the Intranet page, users encounter a structured display of Danish menu information preceding the English counterpart.
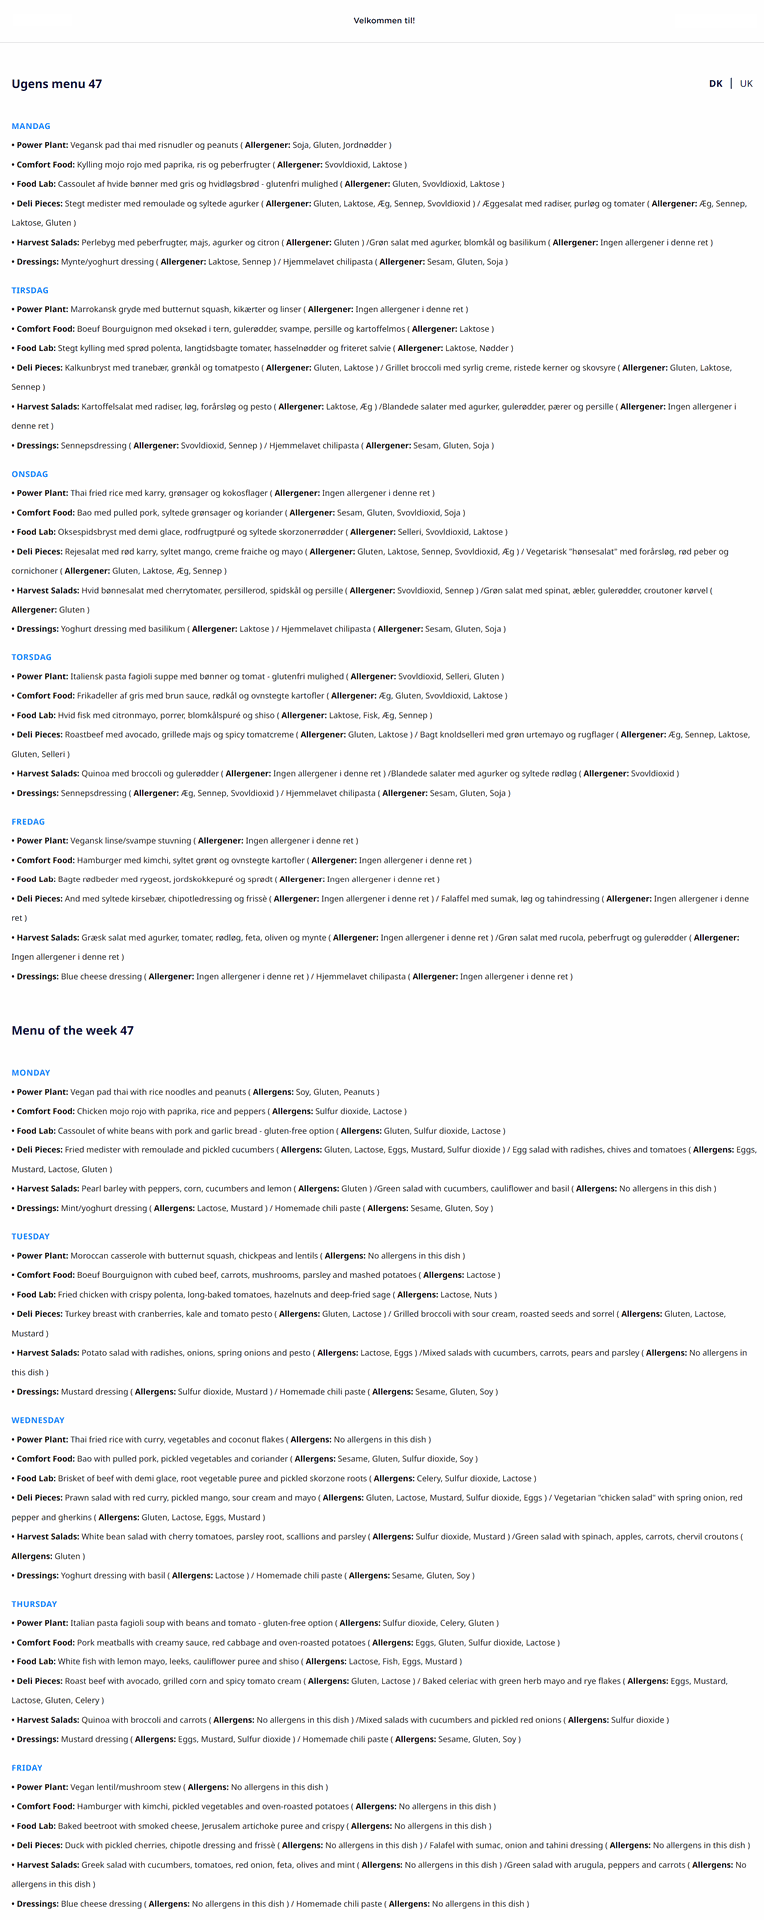
The public page header dynamically showcases the location logo, while a language slider (DK | EN) streamlines navigation. A consistent static footer anchors the Intranet page, ensuring a cohesive user experience in this technically sophisticated project.
Single Merge Menu Banner Page

As a bespoke feature catering to specific client needs, the 'Merge Menu' banner page stands as a distinctive link, strategically positioned at the dashboard's bottom, exclusively accessible to admin users and designated locations
Responding to client input, this custom solution easily integrates Power Plant and Food Lab menu details, along with corresponding allergens, within a singular banner for the current day. Enhancing user convenience, we've implemented two distinct links—'COPY LINK FOR MERGE MENU - DA' and 'COPY LINK FOR MERGE MENU - EN'—facilitating elegant access to Danish and English content, respectively.
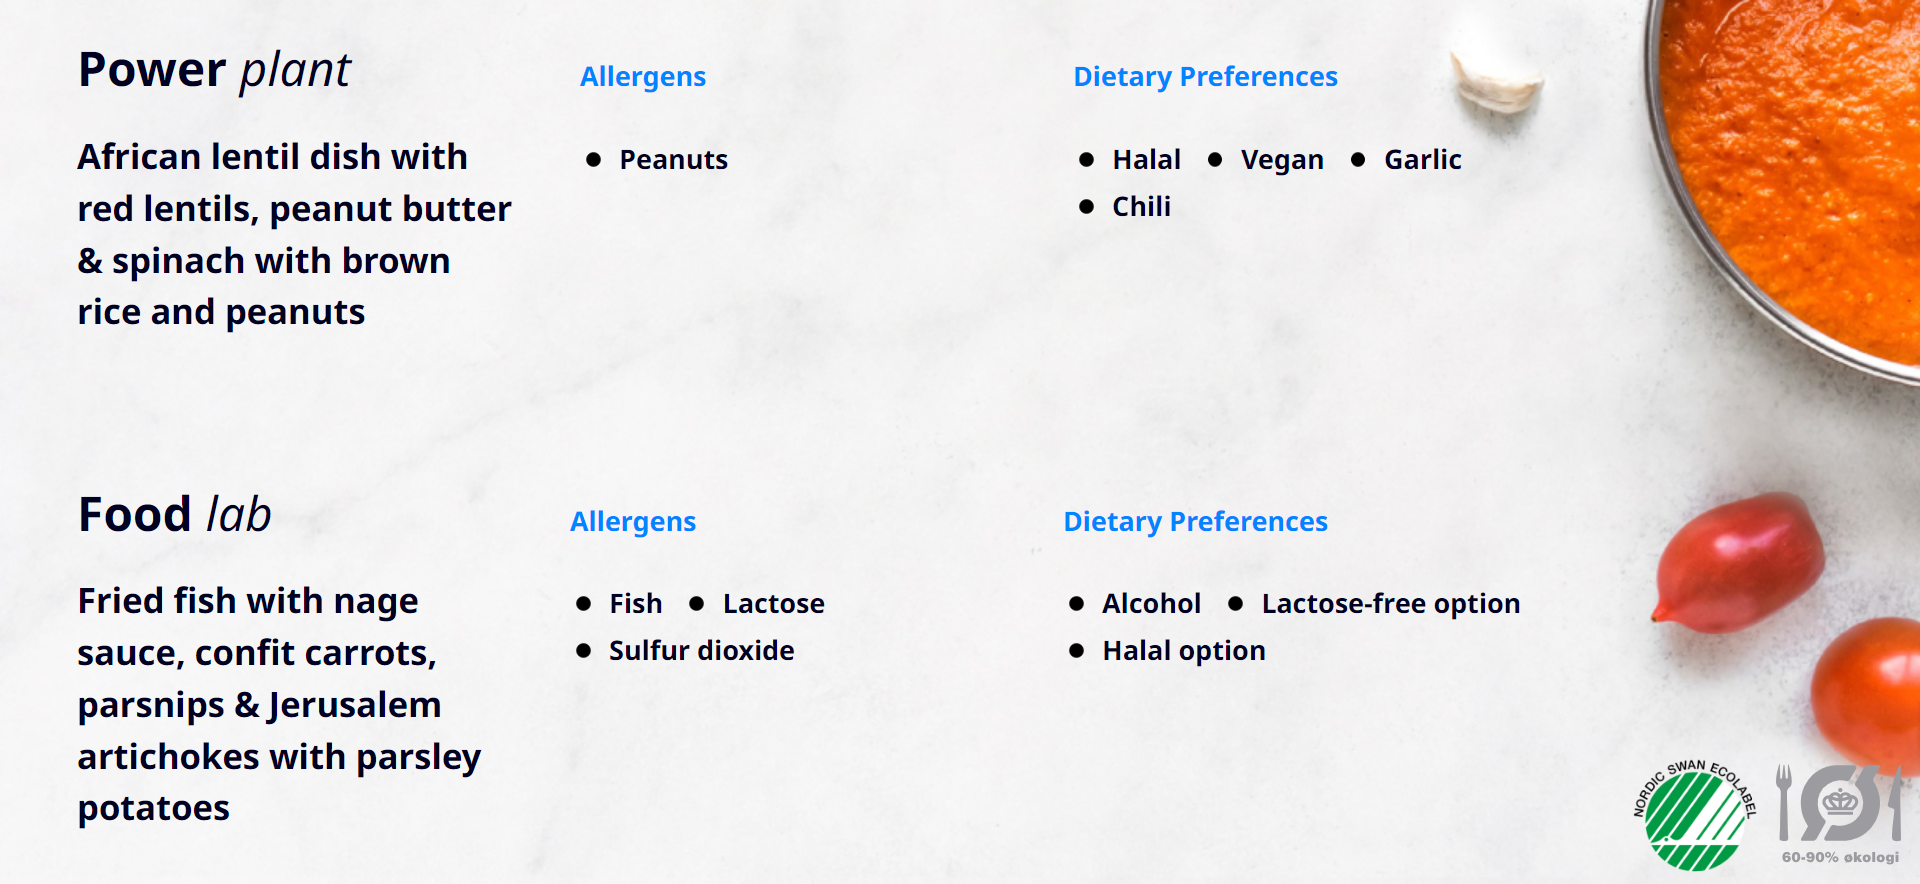
In the absence of menu data, a blank banner image will be displayed. Additionally, any invalid location ID in the banner URL, excluding client locations, will result in an automatic redirection to a 404 error page. This meticulous handling ensures a hassle-free and error-free user experience within the technical framework of the project.
Clear Location Screencloud Cache

Within the administrative domain of the dashboard overview page, a discreet yet powerful feature emerges—the 'Clear Location Screencloud Cache' link. Exclusively reserved for admin users, this link serves as a gateway to trigger an API designed to clear the cache of Screencloud devices at a specific location.
Operated through Screencloud's cache clear API endpoint, this behind-the-scenes process retrieves credentials from the API environment file. Upon activation, a toast message promptly signals either success or error, with the operation tailored to the device screen IDs configured for the designated location.
Clear Site Cloudflare Cache

Situated discreetly at the bottom of the dashboard overview page, the 'Clear Site Cache' link stands as a privilege exclusively for admin users. Upon activation, a meticulously crafted API initiates the Cloudflare cache clearance process, seamlessly tapping into the credentials housed within the API environment file.
A responsive toast message promptly communicates the outcome, signaling either success or relaying any encountered errors. The standard timeframe for Cloudflare site cache clearance typically unfolds within a span of 2-3 minutes.
Record Food Waste
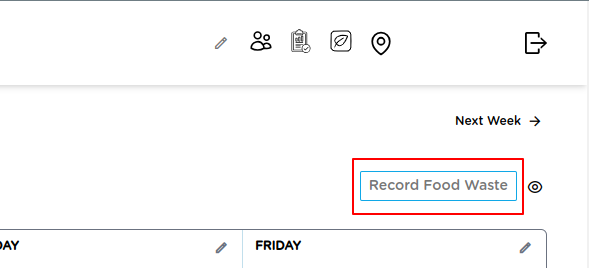
In the systematic tracking of food waste, our solution, 'Record Food Waste,' empowers chefs to input weekly data effortlessly. Through manual entry or copy/paste functionality in the dedicated food waste popup, submitted values are efficiently stored in the backend.
The resulting metrics, encompassing weekdays (Monday to Friday by default), user count, plate waste, and total waste, are dynamically displayed in the informative Food Waste Banner.
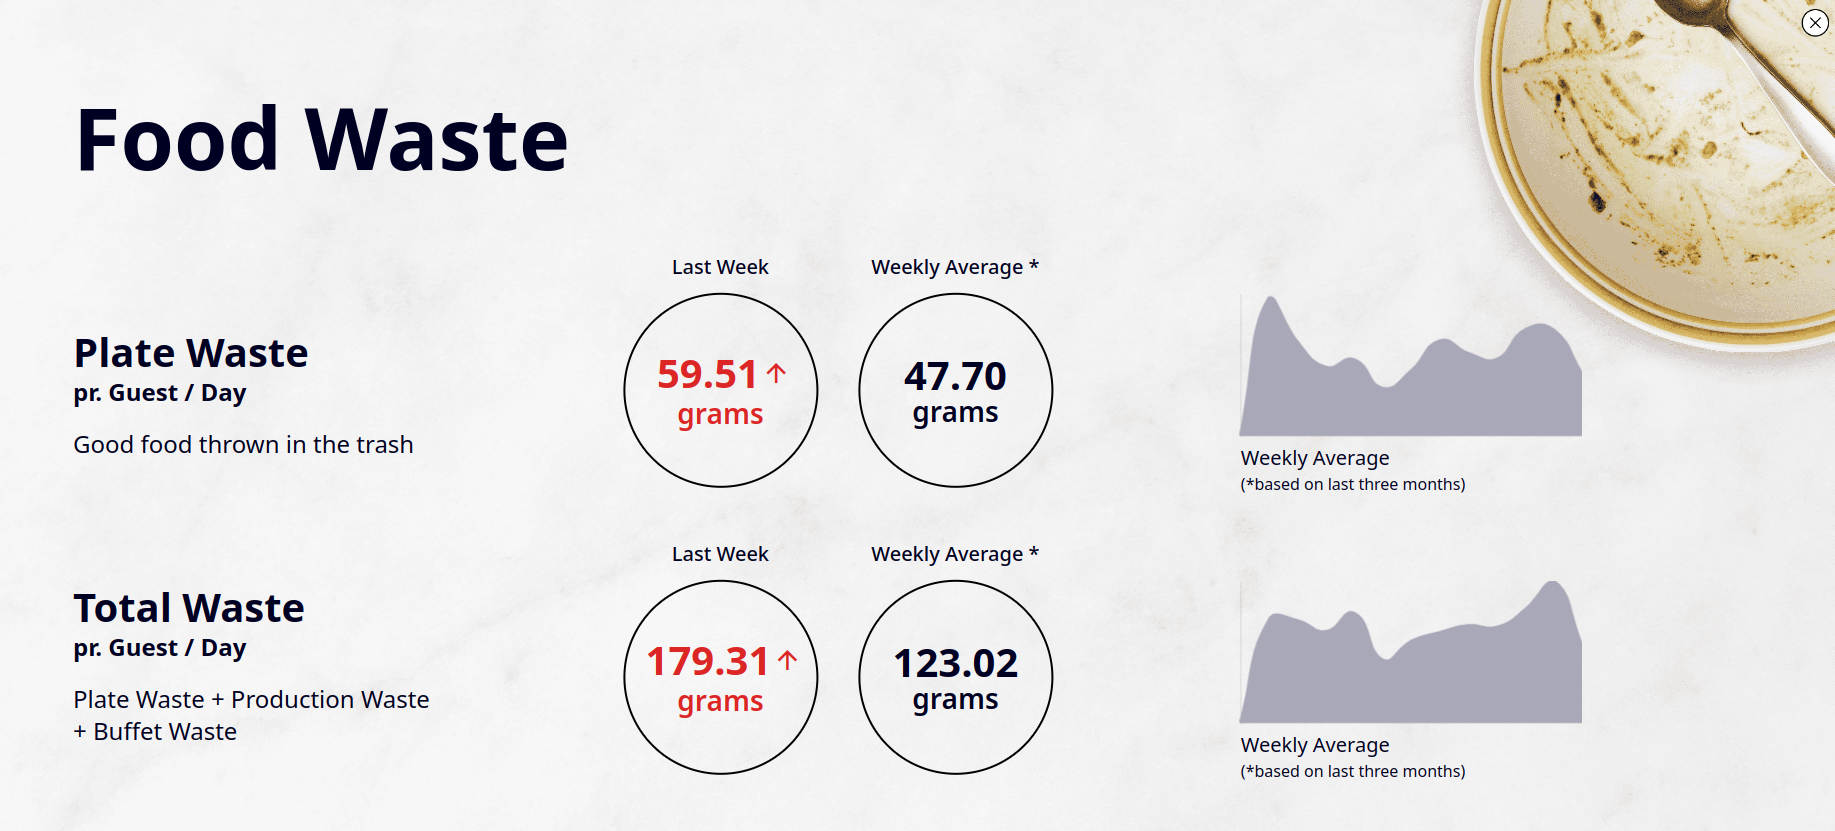
In the banner view, we have last week's plate or total waste and weekly average and graph view based on the last 3 weeks of plate or food waste respectively.
Edit Menu Of The Day Page
In the operational landscape of our technical project, users wield control over station menu data through an intuitive interface. Upon activating the edit button on the dashboard overview page, users seamlessly transition to the edit menu of the day page, marked by station identification and allergen details.
The bilingual input feature empowers users to provide menu content in Danish, with an automatic translation to English. Our dynamic display accounts for location-based station sections, even showcasing day-specific offerings such as Friday's Breakfast. With a 100-character limit, users craft concise menu content, culminating in a 'Save' action that triggers Cloudflare and Screencloud cache clearance.
Post-save, a redirected journey ensues to the corresponding week's dashboard overview, ensuring a smooth and responsive experience. The temporal flexibility extends to menu creation and editing for past, present, and future dates, with flawlessly navigation facilitated by the 'Back Home' button.
After saving the edits made to the menu of the day page, the relevant menu information, allergens, dietary details, ingredients information, as well as the total calories and CO2 emissions, are stored in the backend. We intend to utilize this data to display it in the banner image in the future.
Dashboard Station Menu Banner Preview
When activating the eye icon on the dashboard overview, a station-specific preview emerges, showcasing menu information and allergens against a backdrop tailored to each location. The first icon triggers a Danish preview, while the second initiates an English version with translated allergen details.
In instances lacking allergens, the banner communicates 'No allergens in this dish' or 'Ingen allergener i denne ret,' depending on language. Absence of dietary preferences leaves the banner unpopulated. Each station boasts unique background images; stations with no content showcase an empty banner.
The ecological logo appears solely for Client locations in the bottom right, and the 'Copy link' option, exclusive to admin users, conveniently copies the single-page station banner URL to the clipboard.
Menu Of The Day Banner Preview
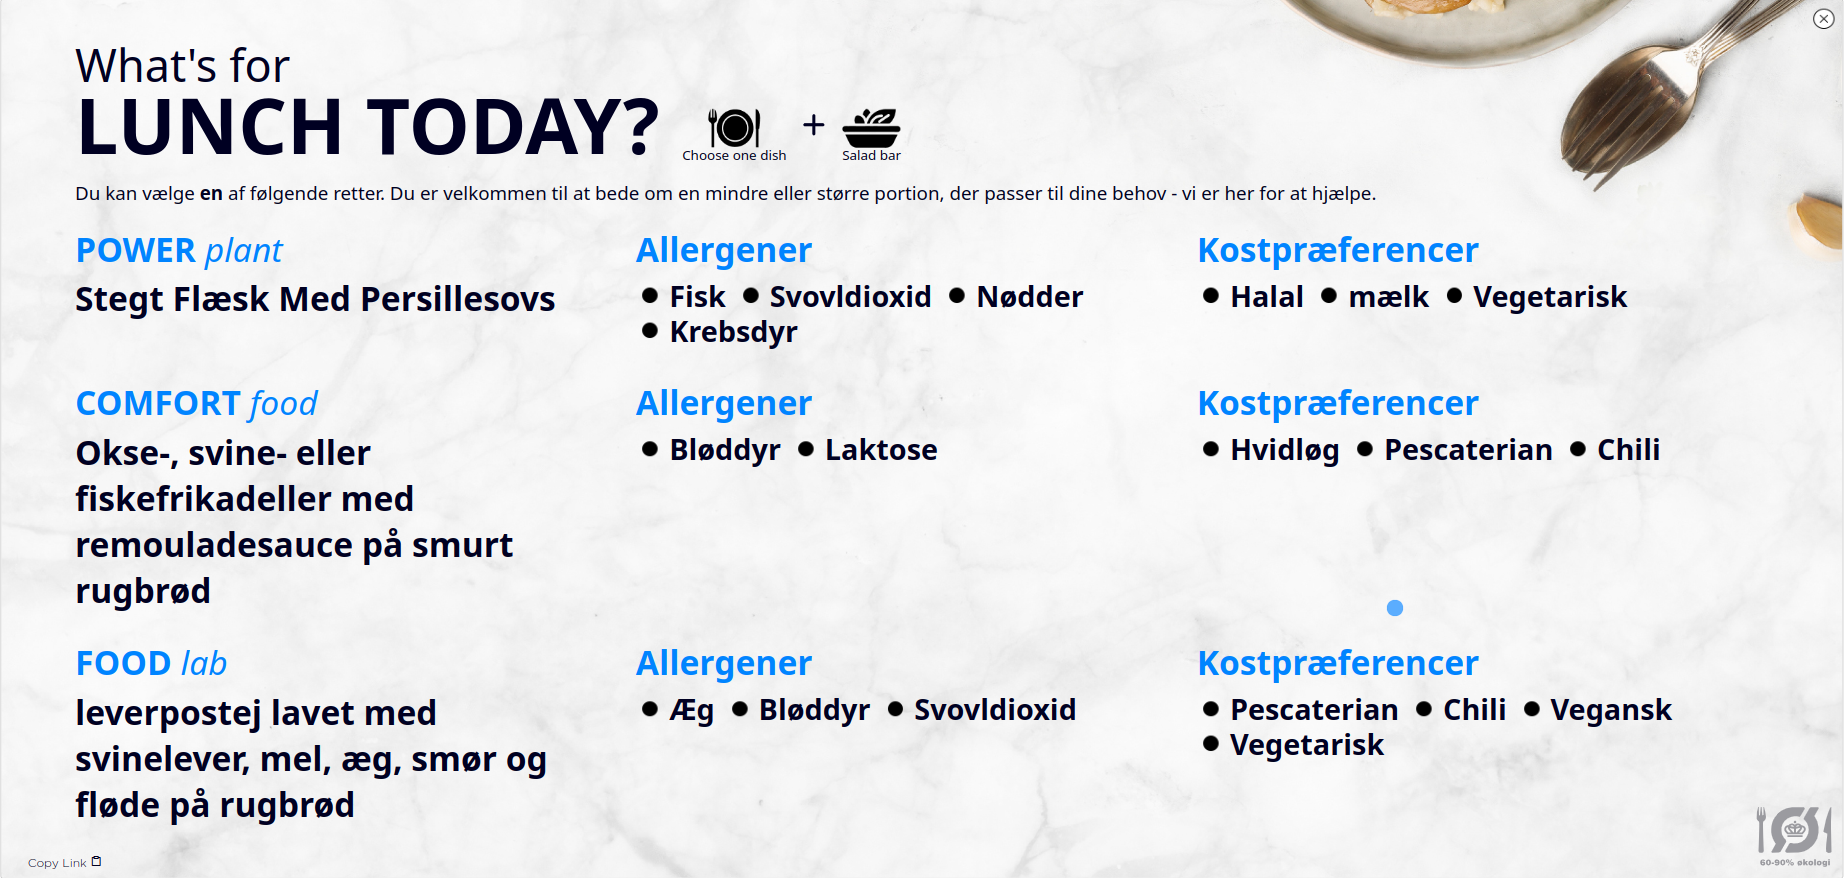
Net Company Menu of the day Danish banner preview
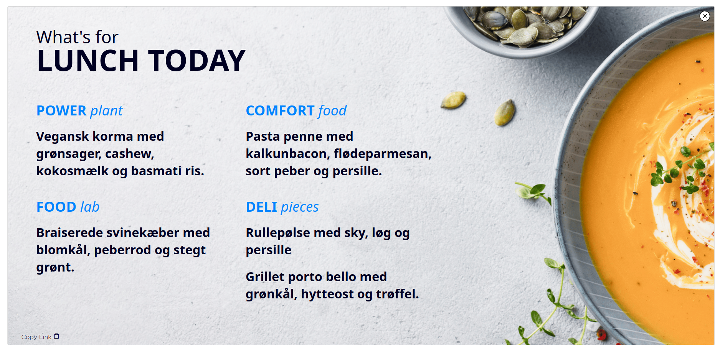
In the Menu Of The Day Banner Preview, amalgamated station menu data based on location is presented, accompanied by two distinct preview icons for Danish and English menu details. Absence of allergens results in a display of 'No allergens in this dish' or 'Ingen allergener i denne ret,' based on language. Dietary preferences left unspecified are represented by an empty banner.
If no content exists for specific stations, an empty banner with the relevant background image is showcased. Notably, the ecological logo exclusively appears for client locations in the bottom right corner, while the "Copy link" option, available only to admin users, resides in the bottom left corner.
Activating the "Copy Link" option copies the corresponding single-page station banner URL to the clipboard. Furthermore, the textual section, 'You can choose one of the following dishes. Do not hesitate to ask for a smaller or larger portion to suit your needs – we are here to help,' is selectively visible solely for client locations.
Edit Marketing Slides
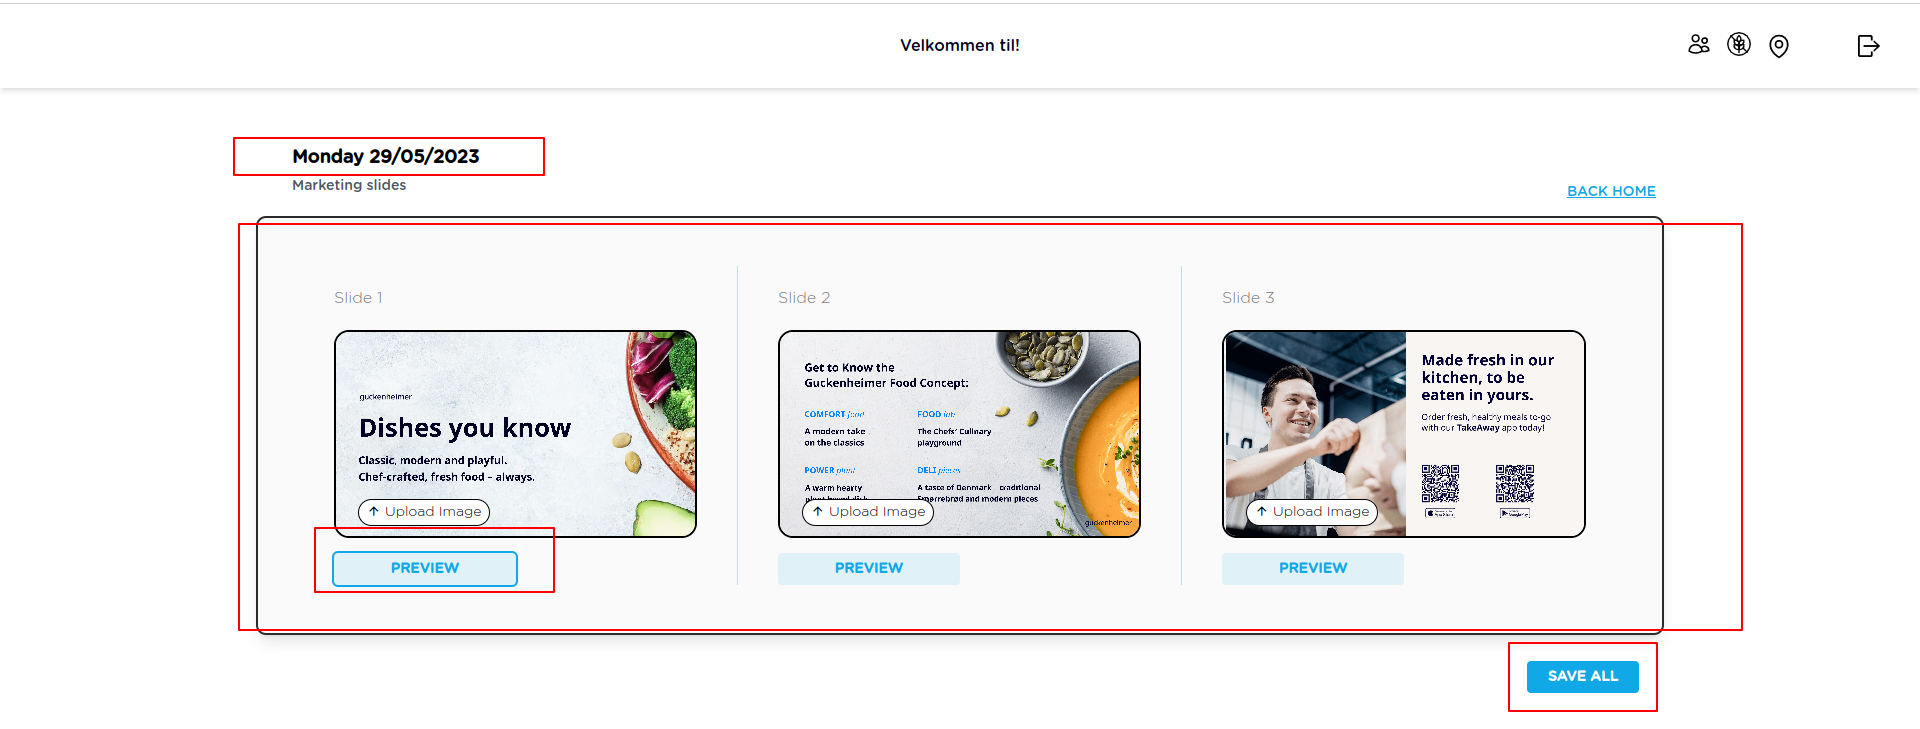
In the realm of our technical project, the "Edit Marketing Slides" mirror the composition of other station banners, ensuring uniformity across interfaces. Activating the edit function adjacent to the daily "Marketing Slides" reveals customization options specific to that day, enabling users to tailor content. Each day boasts three slides with default background images, subject to individualized modifications.
Preview functionalities are granular, permitting users to assess each slide independently. Notably, an option to apply common settings across all three slides streamlines the editing process. The banner's copy link, accessible only to admin users, safeguards confidentiality. Content flexibility is upheld through the capacity to upload new images within a 5MB limit, exclusively in image format, or default content auto-populates based on the designated location.
Dashboard Marketing Slides Preview
Introducing the Dashboard Marketing Slides Preview – a feature accessible via an eye icon on the dashboard overview. Admin users can utilize the 'Copy Link' option, exclusive to them, for individual marketing banners. Default location-based background images populate the marketing slides, but users can effortlessly customize banners for specific days, with the option to copy unique banner URLs with a single click.
Single Page Station Banner
The Single Page Station Banner, sourced from the station preview popup by admin users, is a unique URL. This link, derived from the admin preview, dynamically showcases current-date station details against a backdrop of the respective station's background image.
Attempting to manipulate parameters in the URL leads to a graceful redirection to a 404 page, ensuring data integrity. Each banner URL, distinct in structure, encompasses the station ID, location ID, and language code. Notably, this static URL, configured on the Store Screencloud device, provides consistent and efficient information across all days.
Single Page Menu Of The Day Banner
We engineered a dynamic Single Page Menu of the Day Banner system. Admin users can copy the URL from the respective Menu of the Day preview popup, where each URL is unique, bearing distinct IDs for location, language, and a unique identifier.
This static URL, configured on the Screencloud device at the store, ensures the display of current date Menu of the Day information with a corresponding background image. Notably, any attempt to alter parameters in the URL redirects users to a 404 page, enhancing security and maintaining data integrity."
Logout Page
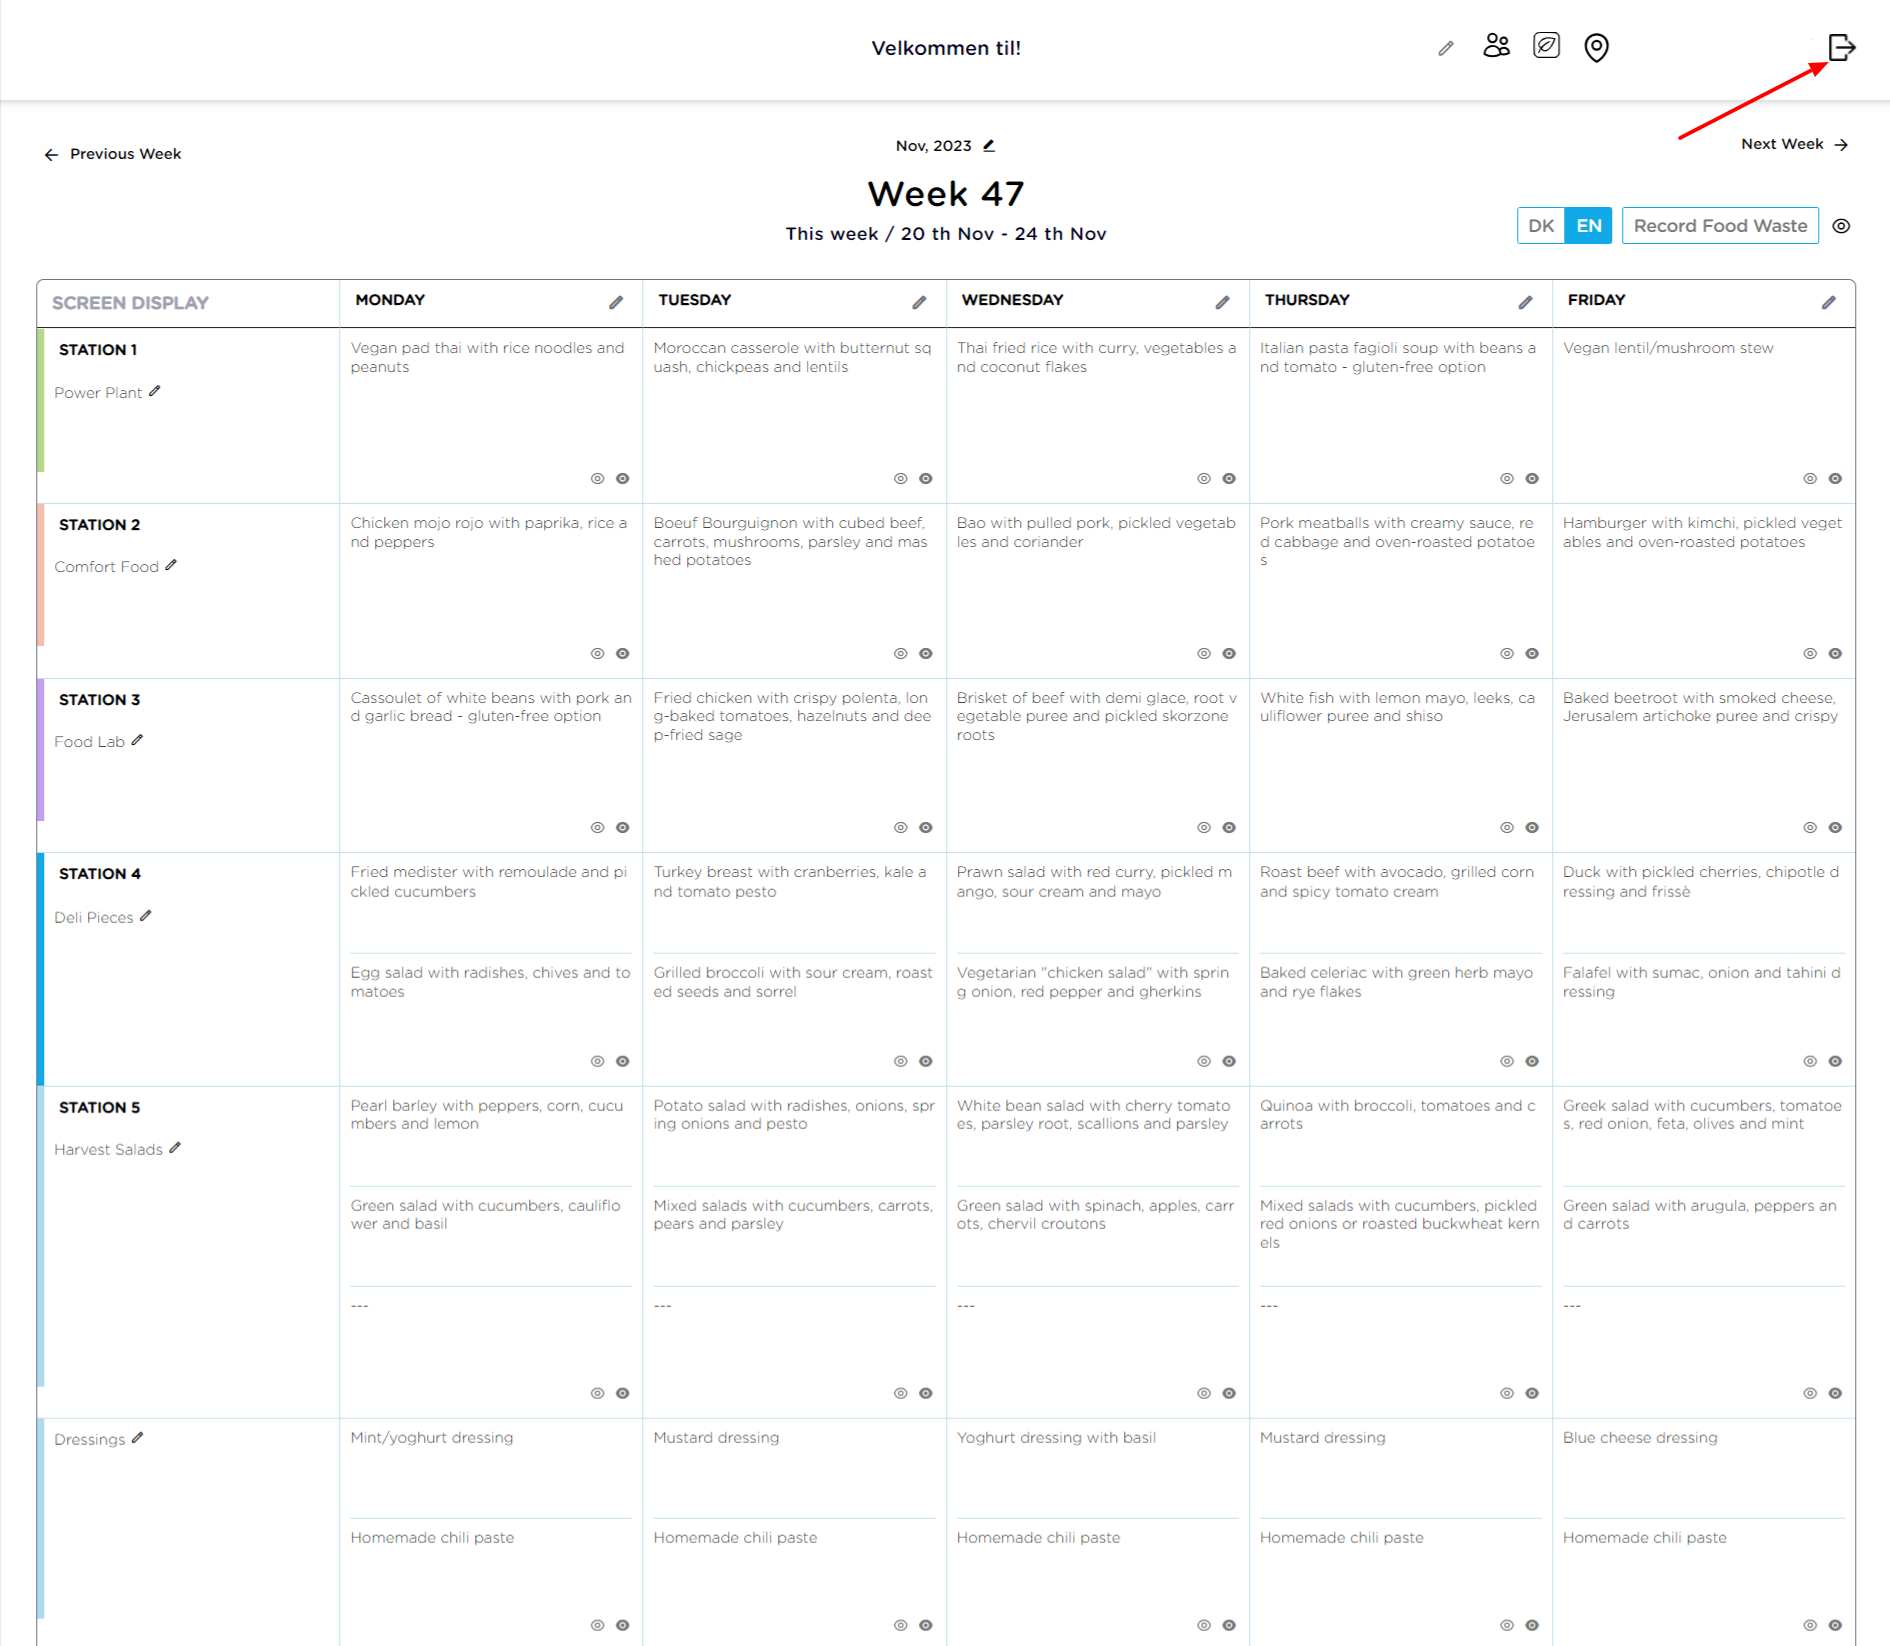
Situated at the pinnacle of the dashboard overview page, a Logout button beckons users to gracefully disengage from the platform. Upon activation, a prompt materializes, seeking user confirmation for the logout action, ensuring intentional disconnection from the website.
These are the Frontend Application features lookup on this (Digital Advertising System) DAS case study, check out the next part of this article here.
